Guidelines for cone judges
Moderators: Jonathan Harms, Robert Thiele
-
- ISSA President 2011-2024
- Posts: 4688
- Joined: Thu Aug 22, 2002 2:00 am
- Location: Sweden, lives in France
- Contact:
Guidelines for cone judges
These are the guidelines for the conejudges at the Trocadero event. I'm posting them here so that they can be used at other events (if you like the idea).
INSTRUCTIONS FOR CONE JUDGES
1. A cone IS considered “hit” if:
a. The racer knocks it over.
b. The racer pushes it beyond the inside edge of the circle.
c. It has been knocked over, or knocked outside the circle, by another cone on the same course.
2. A cone IS NOT considered “hit” if:
a. It remains standing and touches the inside edge of the circle.
b. It has been knocked over, or knocked outside the circle, by a cone from the opposite course.
3. Cone count procedures:
a. As soon as the race has ended, count the cones hit in your section of the course.
b. Raise the corresponding number card overhead, and keep holding it up.
c. Wait for the judging official at the top of the course to raise a green card.
d. Put all hit cones back in their proper place.
e. Display your green card until the next race begins.
4. Raise your red card to indicate a DQ (Disqualification) if:
a. A racer misses a cone.
b. A racer puts a foot on the ground (as in a fall).
c. A racer does not pass the finish line.
d. A racer passes on the wrong side of the cone without knocking it over.*
5. Raise your red card to indicate an emergency if:
a. You haven’t had enough time to put all your cones back in their proper position.
b. A person or object has obstructed the course.
6. If the judging official raises the “R” sign, raise your cone count card until the official raises the green card again.
7. If the judging official raises the “C” sign, check again to make sure all your cones are in their proper position. Then step back and show your green card.
8. If the judging official raises the “T” sign, the timing equipment needs to be tested. (No racer will run the course.) After hearing the start signal, the cone judges at the finish line must step on the finish line strips two or three times. The test may have to be repeated several times.
*To avoid going around a challenging cone, racers will sometimes intentionally hit it from the wrong side. (This is called “Criddling.”) A racer is not Dqed for doing so, as long as the cone is knocked over or out of its circle.
Last edited by Jani Soderhall on Mon Apr 07, 2008 10:41 am, edited 2 times in total.
-
- ISSA President 2011-2024
- Posts: 4688
- Joined: Thu Aug 22, 2002 2:00 am
- Location: Sweden, lives in France
- Contact:
INSTRUCTIONS POUR LES JUGES DE CONES
1. Un cône EST considéré “touché” si :
a. Le concurrent le fait tomber.
b. Le concurrent le pousse complètement en-dehors du cercle intérieur.
c. Le cône tombe, ou est poussé à l’extérieur du cercle intérieur, parce qu’il a été touché par un autre cône de la même course.
2. Un cône N’EST PAS considéré “touché” si :
a. Il reste debout et n’est pas complètement en-dehors du cercle intérieur.
b. Le cône tombe, ou est poussé à l’extérieur du cercle intérieur, parce qu’il a été touché par un cône de l’autre course.
3. Compte des cônes:
a. Dès que la course d’un concurrent est terminée, comptez les cônes touchés dans votre section.
b. Montrez le chiffre correspondant au nombre de cônes touchés, et tenez-le en l’air
c. Attendez que le juge officiel en haut de la course montre le signe vert.
d. Remettez alors tous les cônes touchés en place.
e. Gardez le signe vert en main jusqu’à ce que la course suivante commence.
4. Montrez un signe rouge pour indiquer que le candidat est disqualifié si :
a. Le concurrent manque un cône.
b. Le concurrent pose au moins un pied parterre entre la ligne de départ et la ligne d’arrivée.
c. Le concurrent ne passe pas la ligne d’arrivée.
d. Le concurrent passe du mauvais côté d’un cône sans le faire tomber.
5. Montrez un signe rouge pour indiquer tout incident pouvant interférer avec la course.
a. Vous n’avez pas eu le temps de replacer tous vos cônes.
b. Une personne, un objet, un animal est sur le parcours, etc…
6. Si le juge officiel montre le signe “R”, montrez à nouveau le chiffre correspondant au nombre de cônes touchés jusqu’à ce que le juge montre le signe vert à nouveau.
7. Si le juge officiel montre le signe “C”, vérifiez que tous vos cônes soient bien placés. Puis montrez à nouveau le signe vert.
8. Si le juge officiel montre le signe “T”, cela signifie que le système de chronométrage doit être vérifié. Aucun concurrent ne doit partir. On déclenche alors le signal de départ, et le juge de cône au niveau de la ligne d’arrivée marche dessus deux ou trois fois : Le test peut avoir besoin d’être répété plusieurs fois.
* Pour essayer d’éviter un cône difficile, un concurrent peut intentionellement le toucher du mauvais côté (« criddling »). Un concurrent ne sera pas disqualifié dans la mesure où le cône tombe ou sort complètement en-dehors du cercle intérieur.
-
- www.downhillbillies.org
- Posts: 405
- Joined: Fri Nov 19, 2004 8:23 pm
- Location: Statesville, North Carolina
- Contact:
Judges Cards
Jani,
We are looking to implement the cone counting procedure described here at next year's Dixie Cup race. Is there a card supplier out there of do you just make them out of whatever you can find?
Each judge needs cards numbered 1-10 (if they are assigned 10 cones) and a red and a green correct?
Do judges only judge one lane in dual slalom?
Thanks for the info,
Marion
Marion Karr DHB
DHB WORLD HEADQUARTERS
Sk8sville, North Carolina
HEADBLADE
<br>www.headblade.com
<br>LUCKY 13 TATTOO STUDIO<br>
www.luckythirteentattoo.com<br>
Ninja Bearings
www.skateabsolute.com
DHB WORLD HEADQUARTERS
Sk8sville, North Carolina
HEADBLADE
<br>www.headblade.com
<br>LUCKY 13 TATTOO STUDIO<br>
www.luckythirteentattoo.com<br>
Ninja Bearings
www.skateabsolute.com
-
- ISSA President 2011-2024
- Posts: 4688
- Joined: Thu Aug 22, 2002 2:00 am
- Location: Sweden, lives in France
- Contact:
Marion,
The best is to print large digits (as large as you can) on a white sheet. Print two of each. Then take one 1 and one 2 and put them together and then melt them together with plastic around them (I don't know the term).
If you can print double sided on thicker paper that'll be easier to send through the plastifier and it'll last longer than if you put two sheets together and send it through the plastifier. Like that you're sure to get all the air out.
Make sure you put the digits so that they show the same value in BOTH directions. It is important as half of the audience may be above and half below. Also, you often have the racer at the bottom of the course and the time keeper at the top.
Here's how our sets are put together:
Cover
Rules English
Rules French
1
1
2
2
3
3
4
etc
8
9
9
Red
Red
Green
Green
Back cover
/Jani
-
- www.downhillbillies.org
- Posts: 405
- Joined: Fri Nov 19, 2004 8:23 pm
- Location: Statesville, North Carolina
- Contact:
Thanks, Jani.
Got any photos you can throw up for me to look at?
Marion
Got any photos you can throw up for me to look at?
Marion
Marion Karr DHB
DHB WORLD HEADQUARTERS
Sk8sville, North Carolina
HEADBLADE
<br>www.headblade.com
<br>LUCKY 13 TATTOO STUDIO<br>
www.luckythirteentattoo.com<br>
Ninja Bearings
www.skateabsolute.com
DHB WORLD HEADQUARTERS
Sk8sville, North Carolina
HEADBLADE
<br>www.headblade.com
<br>LUCKY 13 TATTOO STUDIO<br>
www.luckythirteentattoo.com<br>
Ninja Bearings
www.skateabsolute.com
-
- ISSA President 2011-2024
- Posts: 4688
- Joined: Thu Aug 22, 2002 2:00 am
- Location: Sweden, lives in France
- Contact:
Marion,
Sorry it took a while to post these, but here they are!
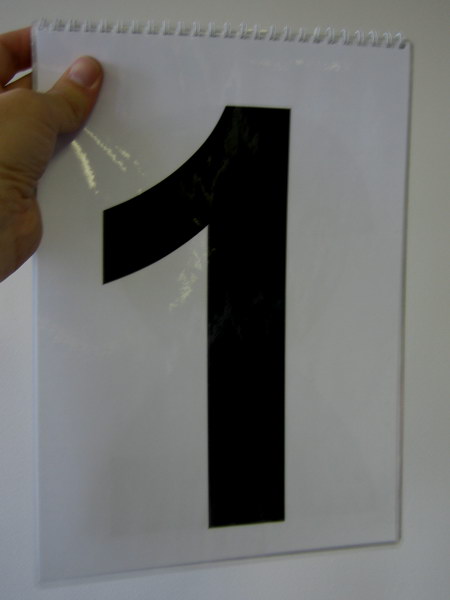
We used to make signs out of cardboard pieces, but they didn't last long, so a couple of years ago Corky and I went into my dads print shop and came up with the following signs made of durable, washable plastic sheets bound together with a metal spiral attachment at the top. The pages can be turned over and the idea is to display the same message (a number or a color) in both directions.
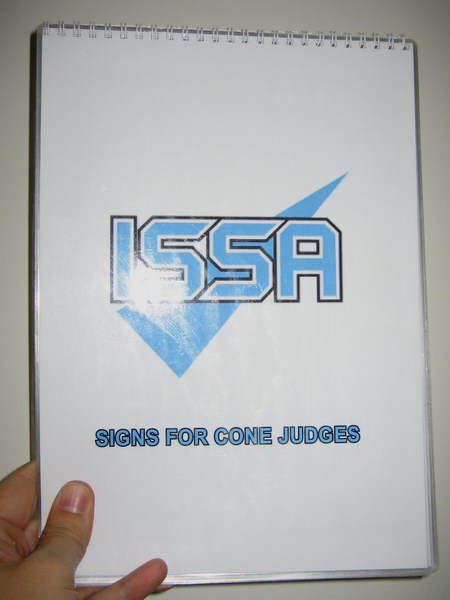
Cover:
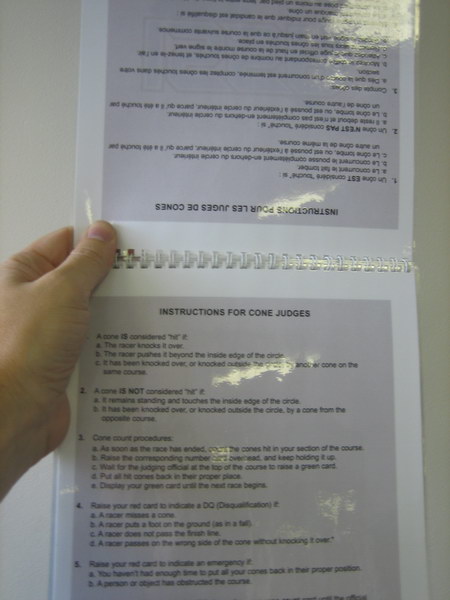
First pages on the inside of the cover has the complete set of instructions on how to display the number of hit cones. Rules were printed in both English and French as their initial use would be at the Paris World Cup.
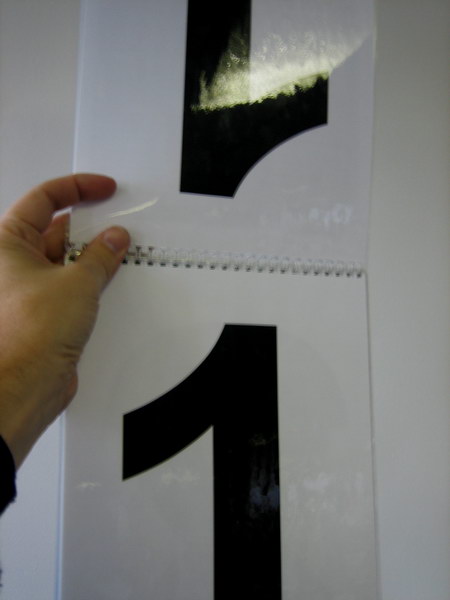
This is the key to the numbers. As you turn the pages the "number" is showing in both directions. Takes a little bit of organization to get it sorted before putting the sheets through the plastifier. It's much easier if you print double sided pages to have just one sheet to plastify. If you have two sheets, there's too much air in between and they'll last less long
Here the booklet is completely folded and can be held up high to show it to the judges table. Make sure you print the digits as large and bold as you can. Every mm in size matters here when you hold up the signs from a distance.
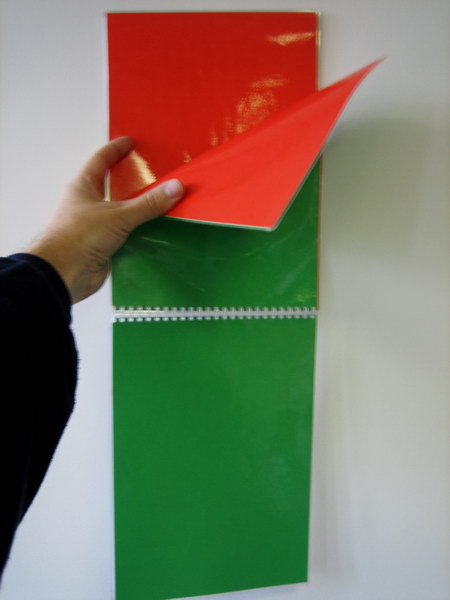
The Red sign can be used to show a DQ. The Green sign is used to show that it was a clear run and that the course is ready for the next racer. We put two colored papers into one sheet here, but ideally we should have printed green and red color onto a single paper sheet (to avoid the air between the two sheets of paper).
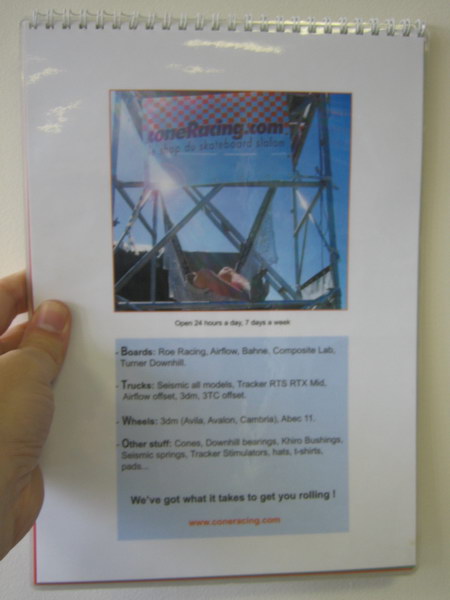
The back cover has a piece of advertising on it. Get your own sponsors and have them pay for your production! ConeRacing.com paid for these.
The pictures are of lousy quality but I think you get the idea.
The original idea came from John Gilmour who had found some plastic sheets with numbers all attached at the top. They probably came from a store or a gas station where they could be used to display a price of a product being promoted. The only problem with these were that when you held them up they were displaying one number in one direction and another in the other, thus the skater down at the bottom would see one number while the cone judges would see the others, so they were difficult to use. But one good idea led to another and this is now probably the best there is to handle the cone judging.
/Jani
-
- Team Roe Racing
- Posts: 1207
- Joined: Tue Aug 27, 2002 2:00 am
- Location: USA
Big box stores = big numbers
The numbers I used came from a large chain store of office supplies called "Staples". In fact almost any huge warehouse style store has these numbers to display prices for their items.
You could certainly ask stores for their dirty ones...As they have no want for any durty numbers.....besides ...after a single race they'll be dirty anyhow. If you feel like putting in time to clean them you can.
You could then glue the numbers together as Jani as mentioned so that only 1 number shows fromt to rear. You also end up with thicker and more durable numbers this way.
Some stores have extra large ones and and a fwe smaller sizes. Let the largest numbers be used at teh bottom and smaller ones at the top....in case you can't get all big numbers.
Cost....free....
Other stores. Walmart, Costco, Sam's Club, BJ's wholesale warehouse, Target etc...etc...etc...
in France???
Careefour? Hypermart?
One good turn deserves another
john gilmour
john gilmour
-
- Etienne
- Posts: 400
- Joined: Wed Oct 30, 2002 1:00 am
- Contact:
-
- ISSA President 2011-2024
- Posts: 4688
- Joined: Thu Aug 22, 2002 2:00 am
- Location: Sweden, lives in France
- Contact:
I'm about to reprint the booklets for the cone judges, and welcome any comments upon these. Also, may I ask the ISSA rule committee to review the above texts for compliance with the 2008 rules?
Thanks for your help!
/Jani
Are there other situations worth mentioning?4. Raise your red card to indicate a DQ (Disqualification) if:
a. A racer misses a cone.
b. A racer puts a foot on the ground (as in a fall).
c. A racer does not pass the finish line.
d. A racer passes on the wrong side of the cone without knocking it over.*
Maybe we should add that the Red card should only be shown for these reasons BEFORE the racer is in the course. After we may need some other means of communication. Suggestions?5. Raise your red card to indicate an emergency if:
a. You haven’t had enough time to put all your cones back in their proper position.
b. A person or object has obstructed the course.
Thanks for your help!
/Jani
-
- 1961-2013 (RIP)
- Posts: 3279
- Joined: Tue Aug 27, 2002 2:00 am
Not to harp too much but . . .
With the newly-approved No Cone Penalty/Max Cone Count rule the only card a cone head would need is the red one. Good runs require nothing, no need for cone counts, DQ gets a red. I would guess, though, the green card would be practical as a quick way to notify the starter the course is reset and ready. No need to leave the table hanging wondering if everything is ready to go.
-
- Claude Regnier
- Posts: 1189
- Joined: Mon Sep 16, 2002 2:00 am
- Location: Cornwall, Ontario, Canada
- Contact:
Re: Guidelines for cone judges
I thought there was a PDF version of this somewhere. I want to get some more printed to make sure we have enough!!!
Many Happy Pumps!
-
- ISSA President 2011-2024
- Posts: 4688
- Joined: Thu Aug 22, 2002 2:00 am
- Location: Sweden, lives in France
- Contact:
Re: Guidelines for cone judges
Sj Kalliokoski wrote:If you can not find it, you can use one we use:
http://www.ojankaivajat.org/images/INST ... JUDGES.pdf
-
- ISSA President 2011-2024
- Posts: 4688
- Joined: Thu Aug 22, 2002 2:00 am
- Location: Sweden, lives in France
- Contact:
Re: Guidelines for cone judges
I just made an update to the Cone Judge booklets. Nothing fantastic compared to my own old ones but better than those we had online here at this site.
The following is a copy from the Resources menu (see top menu of this site)
-----------------------------------------------------------------------------------------
* Cone Judging Booklets for Cone Judges: single pages or as spreads (all updated 2015)
* Cone Judging Booklets for Main Judge: single pages or as spreads
-----------------------------------------------------------------------------------------
Note how the two pages of each do NOT show the same figures or color.
This is very important to remember when you print the pages.
Remember these really important suggestions:
- Ideally print on both sides of a single paper (quite thick so you can't see text on the other side). That avoids air in between the two pages and once plastified they'll last a life time. The green and red are ideally printed, but if you don't want to waste ink in your printer, get hold of colored paper and put them together.
- Make sure you print the figures/pages according to the instructions so that when you have the booklet folded you show the SAME figure towards the top (for the judges) and towards the bottom of the course (for the racers). This is really important to have to have the same figure shown in all directions and be in accordance with the announcers statement too.
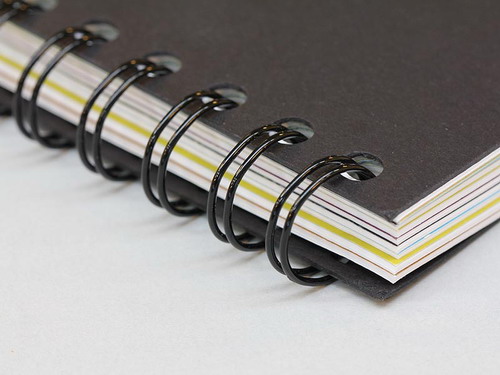
- Wire bindings (circular metal) are better than plastic bindings as they allow the pages to be complete turned over. The also last longer as the plastic tends to break easily.
- If you need a quick solution you can use a simple key chain and just punch a hole in a corner of each sheet.
The following is a copy from the Resources menu (see top menu of this site)
-----------------------------------------------------------------------------------------
* Cone Judging Booklets for Cone Judges: single pages or as spreads (all updated 2015)
* Cone Judging Booklets for Main Judge: single pages or as spreads
-----------------------------------------------------------------------------------------
Note how the two pages of each do NOT show the same figures or color.
This is very important to remember when you print the pages.
Remember these really important suggestions:
- Ideally print on both sides of a single paper (quite thick so you can't see text on the other side). That avoids air in between the two pages and once plastified they'll last a life time. The green and red are ideally printed, but if you don't want to waste ink in your printer, get hold of colored paper and put them together.
- Make sure you print the figures/pages according to the instructions so that when you have the booklet folded you show the SAME figure towards the top (for the judges) and towards the bottom of the course (for the racers). This is really important to have to have the same figure shown in all directions and be in accordance with the announcers statement too.
- Wire bindings (circular metal) are better than plastic bindings as they allow the pages to be complete turned over. The also last longer as the plastic tends to break easily.
- If you need a quick solution you can use a simple key chain and just punch a hole in a corner of each sheet.