"Slalom Shop" DIY modifications and making slalom stuff.
-
Paul Howard
- Posts: 202
- Joined: Sat Dec 27, 2003 7:15 pm
- Location: Corvallis, Oregon. USA
Re: "Slalom Shop" DIY modifications and making slalom stuff.
More pictures of making epoxy/fiber based add-on kicktails, wedges, foot-placement things..........
Sorry about the skipping around of a few pictures and reverse-placement of images, but I think you get the idea.
Hope this helps give people ideas and Thanks for Looking!
-Paul
Sorry about the skipping around of a few pictures and reverse-placement of images, but I think you get the idea.
Hope this helps give people ideas and Thanks for Looking!
-Paul
- Attachments
-
- glue tail 023 (3).JPG (1.99 MiB) Viewed 56288 times
-
- glue tail 022 (3).JPG (1.98 MiB) Viewed 56288 times
-
- glue tail 021 (2).JPG (974.51 KiB) Viewed 56288 times
-
- glue tail 020 (2).JPG (1.65 MiB) Viewed 56288 times
-
- glue tail 019 (2).JPG (1.41 MiB) Viewed 56288 times
-
- glue tail 018 (3).JPG (1.03 MiB) Viewed 56288 times
I just dig slalom!
-
Paul Howard
- Posts: 202
- Joined: Sat Dec 27, 2003 7:15 pm
- Location: Corvallis, Oregon. USA
Re: "Slalom Shop" DIY modifications and making slalom stuff.
Making an Epoxy/Fiber Add-on Foot placement Wegde, kicktail, or Whatever...
Sorry for the out-of-order and reverse-order of pictures.
Thanks for Looking! -Paul
Sorry for the out-of-order and reverse-order of pictures.
Thanks for Looking! -Paul
- Attachments
-
- glue tail 016 (3).JPG (1.03 MiB) Viewed 56288 times
-
- glue tail 014 (3).JPG (585.79 KiB) Viewed 56288 times
-
- glue tail 010 (3).JPG (1.16 MiB) Viewed 56288 times
-
- glue tail 009 (2).JPG (800.5 KiB) Viewed 56288 times
-
- glue tail 008 (3).JPG (1 MiB) Viewed 56288 times
-
- glue tail 006 (2).JPG (1.29 MiB) Viewed 56288 times
-
- glue tail 005 (3).JPG (780.33 KiB) Viewed 56288 times
-
- glue tail 004 (2).JPG (1.32 MiB) Viewed 56288 times
-
- glue tail 003 (3).JPG (1.19 MiB) Viewed 56288 times
-
- glue tail 002 (2).JPG (1.49 MiB) Viewed 56288 times
Last edited by Paul Howard on Sun Nov 24, 2019 10:42 pm, edited 2 times in total.
I just dig slalom!
-
Paul Howard
- Posts: 202
- Joined: Sat Dec 27, 2003 7:15 pm
- Location: Corvallis, Oregon. USA
Re: "Slalom Shop" DIY modifications and making slalom stuff.
I finally got out and rode the Modified TTC and it works Great!!! I rode the same board through the course 5+ times with my Phase 1 Rear Splitfire "Dialed-in", then changed to the TTC, got it "dialed-in", then rode as fast and hard through the course as possible and it was very, very similar, good stability, good traction, good power through the big whole-body-pump Big offsets, able to twitch quickly through the 4.5 foot and 5 foot center to center tight sections, overall it was a very noticeable improvement, I'll probably go ahead and do the same thing on my remaining 100mm and 130mm TTC hangers some time in the future hopefully.
- Attachments
-
- slalom 004.JPG (551.09 KiB) Viewed 58797 times
-
- slalom 003.JPG (133.26 KiB) Viewed 58797 times
I just dig slalom!
-
Paul Howard
- Posts: 202
- Joined: Sat Dec 27, 2003 7:15 pm
- Location: Corvallis, Oregon. USA
Re: "Slalom Shop" DIY modifications and making slalom stuff.
OK, finally I finished this project, hopefully all the pictures leave no questions unanswered, but this is only one way to do things, there might be better ways out there. Thanks for checking this out.
- Attachments
-
- Use a mirror to monitor alignment. Used for pilot hole.
- TTC 003.JPG (153.11 KiB) Viewed 58946 times
-
- Note small bathroom mirror to check alignment 90 deg from the other mirror so your X and Y axis are both being monitored. Used for pilot hole.
- TTC 004.JPG (154.15 KiB) Viewed 58946 times
-
- This is how it should fit - Modified TTC.
- TTC 033.JPG (123.15 KiB) Viewed 58946 times
-
- Fineshed Modified Pivot-Angle TTC, a Thing of Beauty!
- TTC 051.JPG (130.43 KiB) Viewed 58946 times
I just dig slalom!
-
Paul Howard
- Posts: 202
- Joined: Sat Dec 27, 2003 7:15 pm
- Location: Corvallis, Oregon. USA
Re: "Slalom Shop" DIY modifications and making slalom stuff.
More pictures, including the milling machine used after my friend's insistance, glad I listened, but you can do this without a milling machine if you take your time and proceed slow and careful.
- Attachments
-
- Close up, you can see why this make for more precise controlled work.
- TTC 005.JPG (149.5 KiB) Viewed 58946 times
-
- My friend's friend's awesome milling machine, Use one if you have any access to one.
- TTC 006.JPG (144.69 KiB) Viewed 58946 times
-
- Tap, matching drill bit for tap, pilot-hole smaller drill bit, and screws for pivots.
- TTC 007.JPG (138.06 KiB) Viewed 58946 times
-
- JB Weld metal Epoxy.
- TTC 011.JPG (122.08 KiB) Viewed 58946 times
-
- The "Easy-Bake" oven used to fast-cure JB Weld Epoxy. Works like a charm.
- TTC 013.JPG (119.22 KiB) Viewed 58946 times
-
- Done baking on "warm" for 30+ minutes and completely hardened and MUCH faster.
- TTC 014.JPG (141.65 KiB) Viewed 58946 times
-
- Larger Quick-grip to secure handle end of drill.
- TTC 015.JPG (128.97 KiB) Viewed 58946 times
-
- Note small Quick-Grip on drill trigger switch, easy to knock off in an emergency.
- TTC 019.JPG (134.08 KiB) Viewed 58946 times
-
- Drill handle used as a clamping anchor.
- TTC 016.JPG (131.58 KiB) Viewed 58946 times
-
- "Raw" pivot screw with cured JB Weld.
- TTC 017.JPG (136.86 KiB) Viewed 58946 times
I just dig slalom!
-
Paul Howard
- Posts: 202
- Joined: Sat Dec 27, 2003 7:15 pm
- Location: Corvallis, Oregon. USA
Finishing the 1st TTC-Rebuild, Done!!
Here's the rest of this project:
- Attachments
-
- Use your files in a sweeping motion while your drill turns fairly fast (but generally not full speed). Note use of a bearing spacer to protect the thread while you use the file at the base what will be a ball pivot.
- TTC 024.JPG (124.53 KiB) Viewed 58946 times
-
- Getting close but not quite there yet.
- TTC 025.JPG (142.94 KiB) Viewed 58946 times
-
- Test for size with the pivot cup for the baseplate you're using.
- TTC 027.JPG (141.62 KiB) Viewed 58946 times
-
- Polish the new ball pivot nice and smooth with emery cloth.
- TTC 028.JPG (134.75 KiB) Viewed 58946 times
-
- View of Unmodified TTC.
- TTC 031.JPG (127.02 KiB) Viewed 58946 times
-
- Unmodified TTC, note not "naturally" sitting correctly no matter how much you move the pivot screw in or out, the angles-n-heights never match.
- TTC 029.JPG (128.19 KiB) Viewed 58946 times
-
- This is the Modified TTC, See now much nicer everything fits and seated correctly.
- TTC 034.JPG (121.13 KiB) Viewed 58946 times
-
- The type of bicycle bearing greases I like to use.
- TTC 035.JPG (127.2 KiB) Viewed 58946 times
-
- Grease the screw, the hole it goes into, and both jam nuts.
- TTC 036.JPG (135.68 KiB) Viewed 58946 times
-
- Grease the pivot point.
- TTC 038.JPG (130.37 KiB) Viewed 58946 times
I just dig slalom!
-
Paul Howard
- Posts: 202
- Joined: Sat Dec 27, 2003 7:15 pm
- Location: Corvallis, Oregon. USA
Finishing the 1st TTC-Rebuild, Done!!
Finally, I'm done with the 1st TTC-rebuild project. I was going to do this completely at home then a friend of mine with access to his friends metal machine shop told me to swing by so I did a few things there. If you have access to a milling machine, I HIGHLY recommend using one, if not, this project is still possible.
I'll start here at sorta the end with inserting a urethane "bearing" into the hanger/kinpin interface, I do this on all my slalom trucks that didn't come with a spherical bearing. This helps very noticably and it puts a lot less strain on the kingpin. I also ride a place with a LOT of sidewalk cracks where a spherical bearing truck would be prone to snapping the kingpins.
I'll start here at sorta the end with inserting a urethane "bearing" into the hanger/kinpin interface, I do this on all my slalom trucks that didn't come with a spherical bearing. This helps very noticably and it puts a lot less strain on the kingpin. I also ride a place with a LOT of sidewalk cracks where a spherical bearing truck would be prone to snapping the kingpins.
- Attachments
-
- Spherical bearing substitute: Start with hard bushing you don't like (like stock Indy or whatever) or good hard Khiro or whatever.
- TTC 039.JPG (132.45 KiB) Viewed 58946 times
-
- Making the "Poor Man's Spherical Kingpin bearing"
- TTC 041.JPG (125.96 KiB) Viewed 58948 times
-
- Here's what you get.
- TTC 042.JPG (127.42 KiB) Viewed 58948 times
-
- You can trim with a very sharp thin knife, or.....
- TTC 044.JPG (127.57 KiB) Viewed 58948 times
-
- Or, Trim with scissors.
- TTC 046.JPG (127.17 KiB) Viewed 58948 times
-
- It goes here.....
- TTC 047.JPG (133.91 KiB) Viewed 58948 times
-
- The bushings hold the yellow "donut" in place.
- TTC 049.JPG (131.21 KiB) Viewed 58948 times
-
- filing the corners to avoid wheel core contact (most wheels don't have this problem, a few do).
- TTC 050.JPG (145.33 KiB) Viewed 58948 times
-
- Taaa-daaa!! Ready to go test ride this beauty!
- TTC 051.JPG (130.43 KiB) Viewed 58948 times
I just dig slalom!
-
Paul Howard
- Posts: 202
- Joined: Sat Dec 27, 2003 7:15 pm
- Location: Corvallis, Oregon. USA
Pierre's Front Foot-stopper........
Pierre Gravels' front foot stopper.
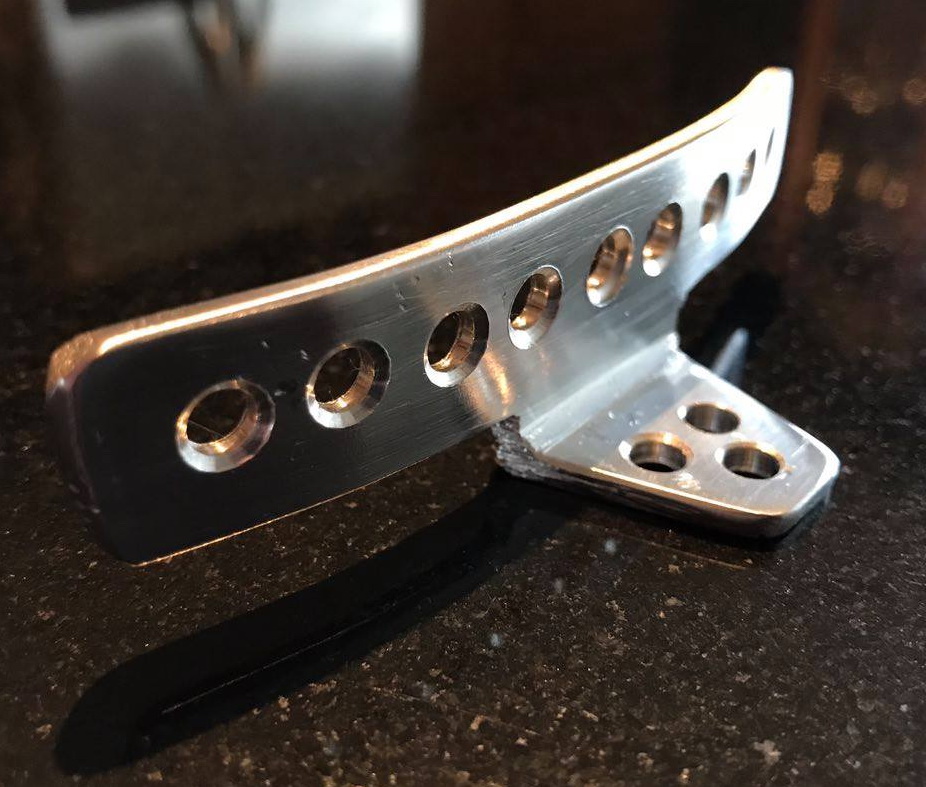
Finished product, check out the link for how to make this nice piece of work yourself. Thanks Pierre!!
http://pierregraveldesign.com/wp-conten ... Fx1zdfLzUo

Finished product, check out the link for how to make this nice piece of work yourself. Thanks Pierre!!
http://pierregraveldesign.com/wp-conten ... Fx1zdfLzUo
I just dig slalom!
-
Paul Howard
- Posts: 202
- Joined: Sat Dec 27, 2003 7:15 pm
- Location: Corvallis, Oregon. USA
Re: "Slalom Shop" DIY modifications and making slalom stuff.
OK, more of the same Re-drilling theme:
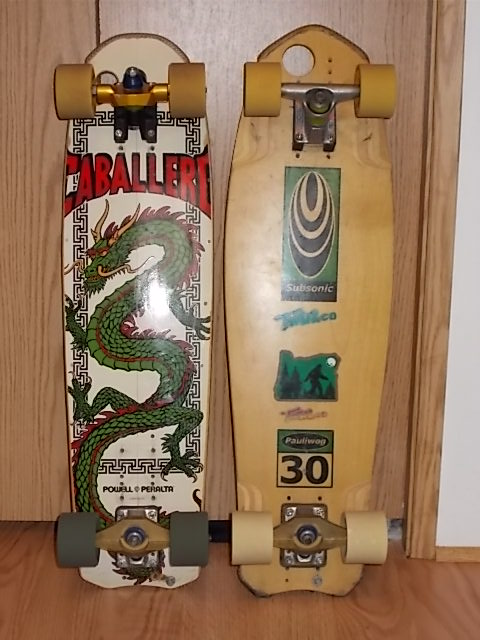
Look closely at the axle-to-axle wheelbases, same rear trucks (Asphalt Playground Phase 1 Splitfires) but Subsonic has a Tracker RT-X, and the other Powell Cab has a Sk8kings 2X front, notice how both setups have same axle-to-axle distance but different mounting hole distances.
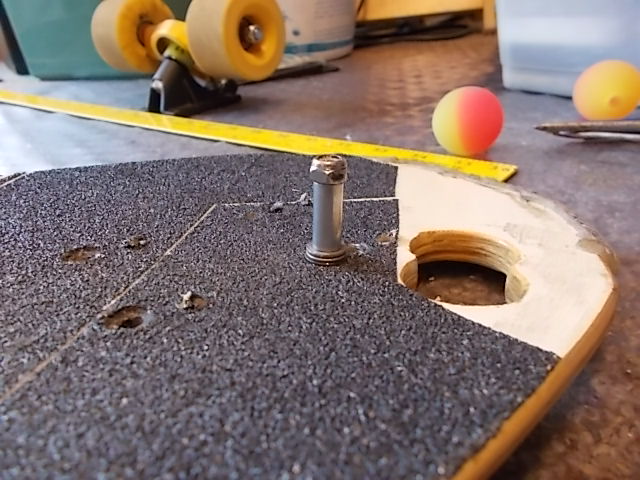
Top side, I like this device because it allows me to rotate my front foot but still keeps it where I want it.
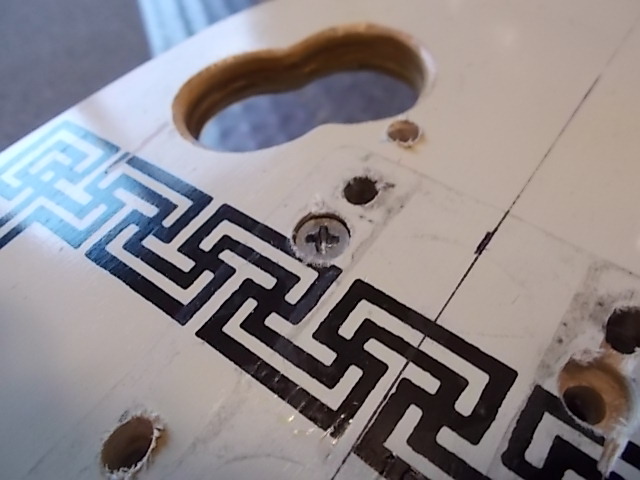
Same thing.
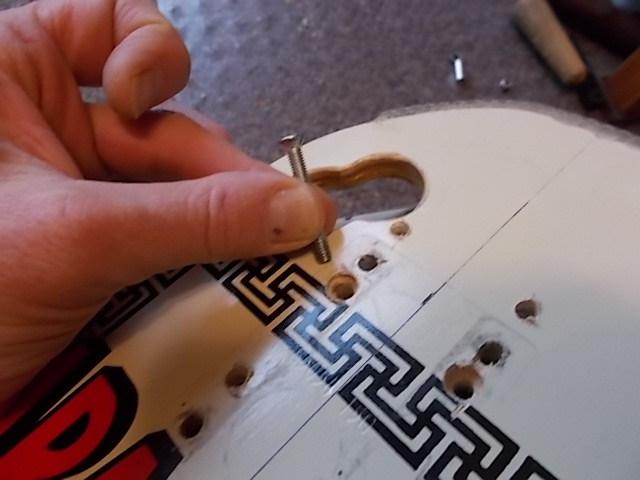
Using countersunk screw for my front foot placement device.
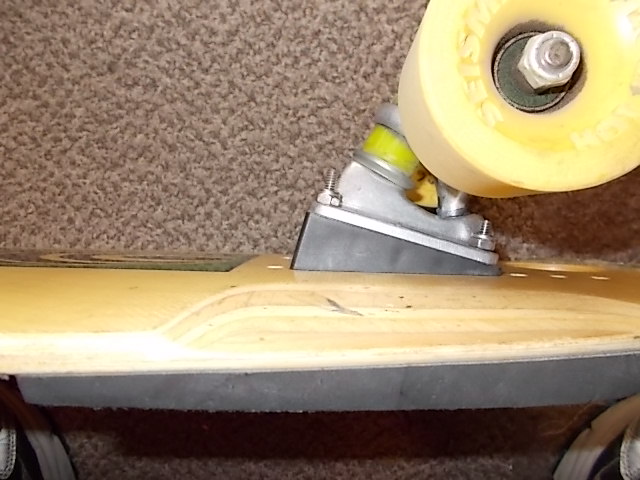
This is why I angle the drill and holes, it will be better for your mounting hardware and not bend the ends of the screws as you tighten them down.
Look closely at the axle-to-axle wheelbases, same rear trucks (Asphalt Playground Phase 1 Splitfires) but Subsonic has a Tracker RT-X, and the other Powell Cab has a Sk8kings 2X front, notice how both setups have same axle-to-axle distance but different mounting hole distances.
Top side, I like this device because it allows me to rotate my front foot but still keeps it where I want it.
Same thing.
Using countersunk screw for my front foot placement device.
This is why I angle the drill and holes, it will be better for your mounting hardware and not bend the ends of the screws as you tighten them down.
I just dig slalom!
-
Paul Howard
- Posts: 202
- Joined: Sat Dec 27, 2003 7:15 pm
- Location: Corvallis, Oregon. USA
Re: "Slalom Shop" DIY modifications and making slalom stuff.
OK, so here's a tangent on another current project, RE-drilling a deck for different wheelbase or different truck, etc. This is generally common knowledge, but for those who haven't done this but are thinking about it, this is for you.
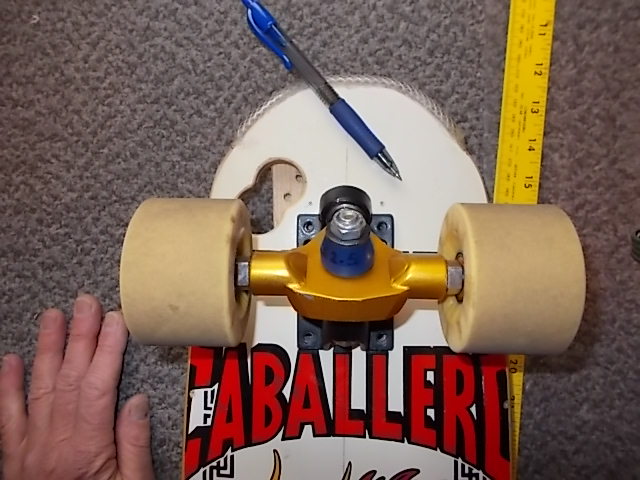
Truck sitting where the holes currently are, nothing really "wrong" I just want more axle-to-axle distance so my Tight slalom board wheelbases match.
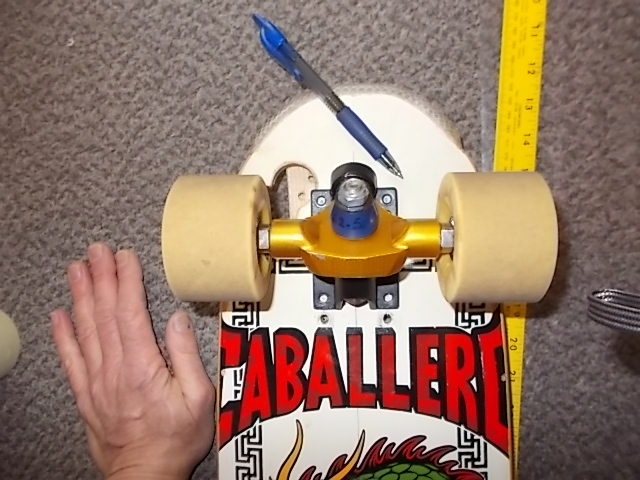
Where the truck is going to go.
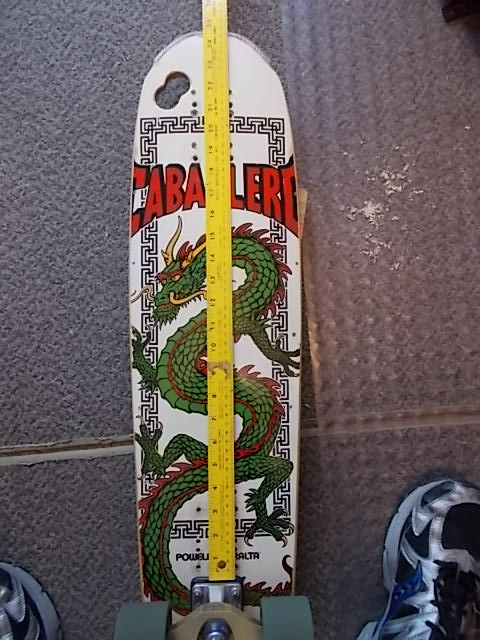
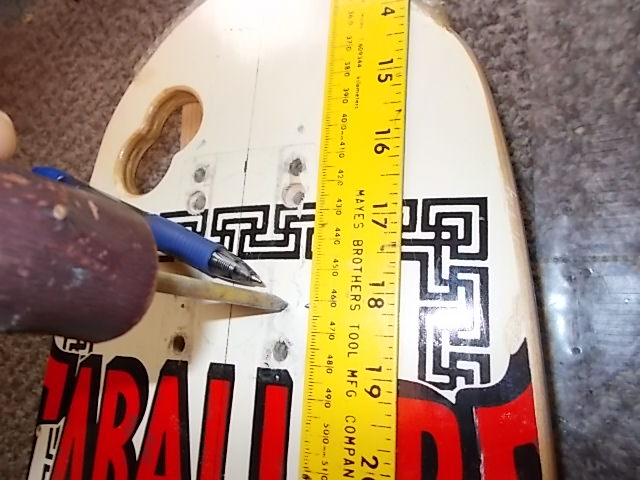
Using a yardstick/meterstick/straightedge to align new holes with rear holes (and the centerline of the deck)>
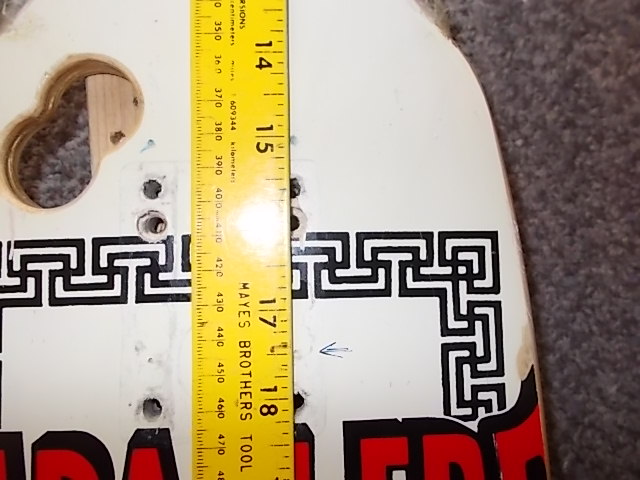
Measuring for the English system folks....
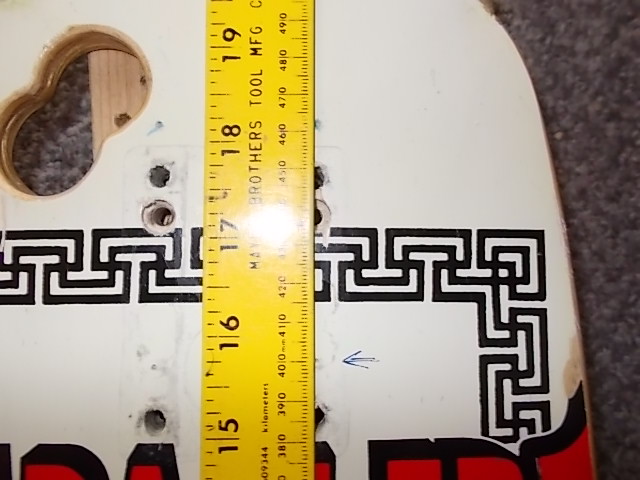
Measuring for the Metric System folks everywhere else.
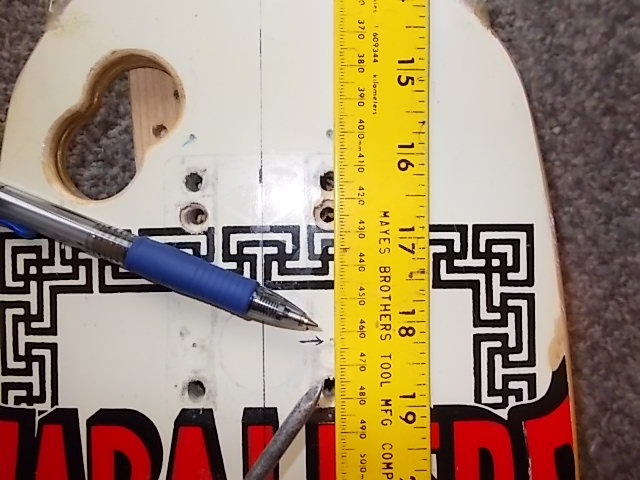
Marking the spots.
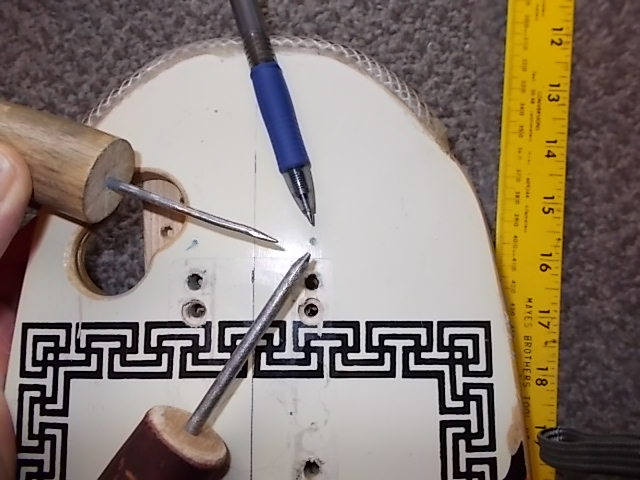
Pen, punch, awl
Use your awl, punch or even a nail to start the spot where you will drill to prevent the drill bit from wandering.
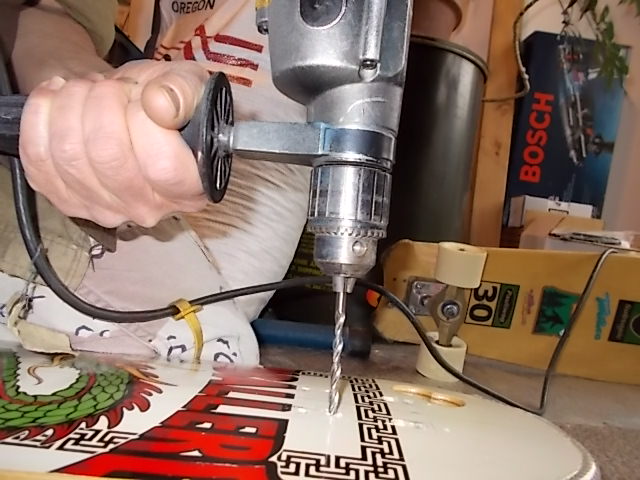
Start your drilling nice and straight, drill just a teeny tiny amount, then......
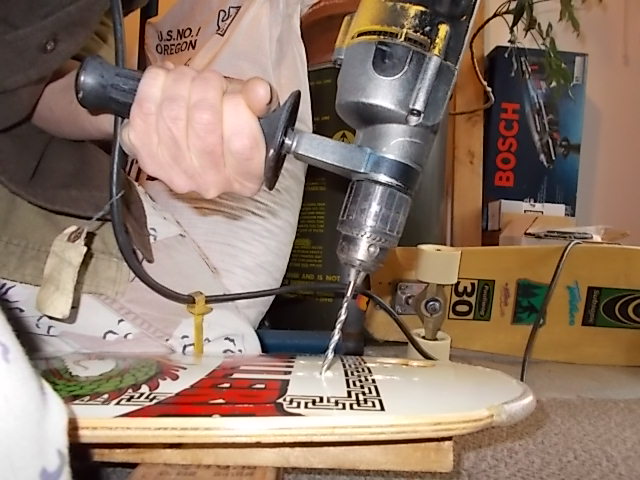
Tilt the drill to match the steepest wedge risers you might end up using. If you only use trucks with variable geometry hangers, you can stay with straight holes.
Truck sitting where the holes currently are, nothing really "wrong" I just want more axle-to-axle distance so my Tight slalom board wheelbases match.
Where the truck is going to go.
Using a yardstick/meterstick/straightedge to align new holes with rear holes (and the centerline of the deck)>
Measuring for the English system folks....
Measuring for the Metric System folks everywhere else.
Marking the spots.
Pen, punch, awl
Use your awl, punch or even a nail to start the spot where you will drill to prevent the drill bit from wandering.
Start your drilling nice and straight, drill just a teeny tiny amount, then......
Tilt the drill to match the steepest wedge risers you might end up using. If you only use trucks with variable geometry hangers, you can stay with straight holes.
I just dig slalom!
-
Paul Howard
- Posts: 202
- Joined: Sat Dec 27, 2003 7:15 pm
- Location: Corvallis, Oregon. USA
Re: "Slalom Shop" DIY modifications and making slalom stuff.
Maurizio Montigiani's interesting hybrid rear truck:
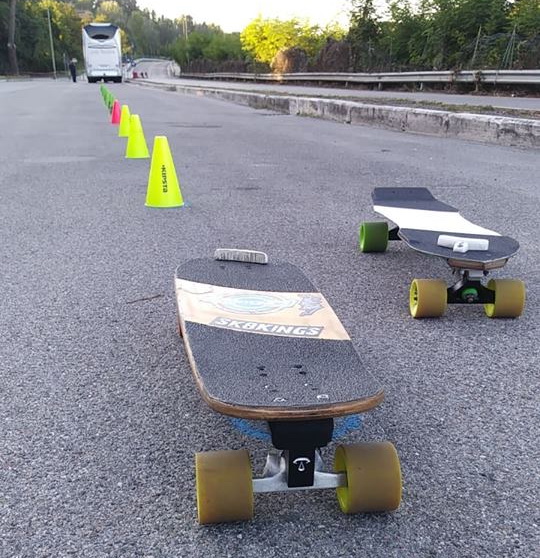
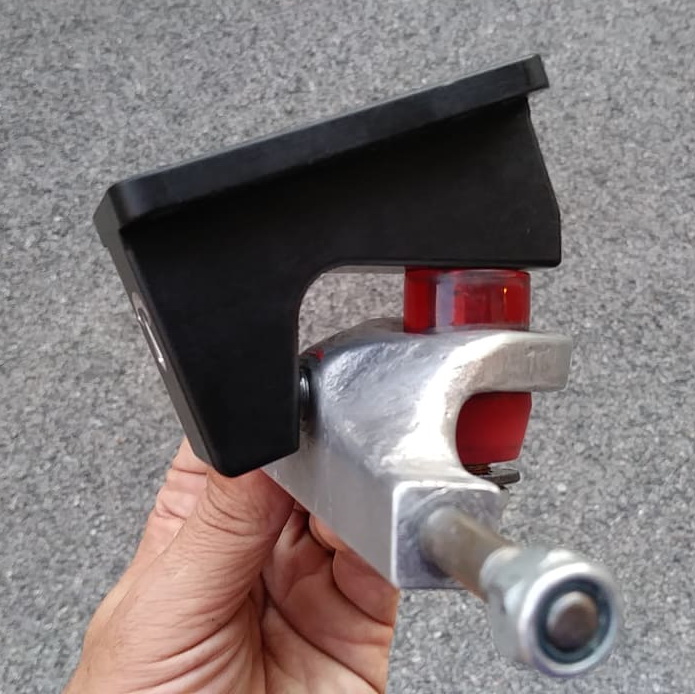
Thanks Maurizio!


Thanks Maurizio!
I just dig slalom!
-
Paul Howard
- Posts: 202
- Joined: Sat Dec 27, 2003 7:15 pm
- Location: Corvallis, Oregon. USA
Re: "Slalom Shop" DIY modifications and making slalom stuff.
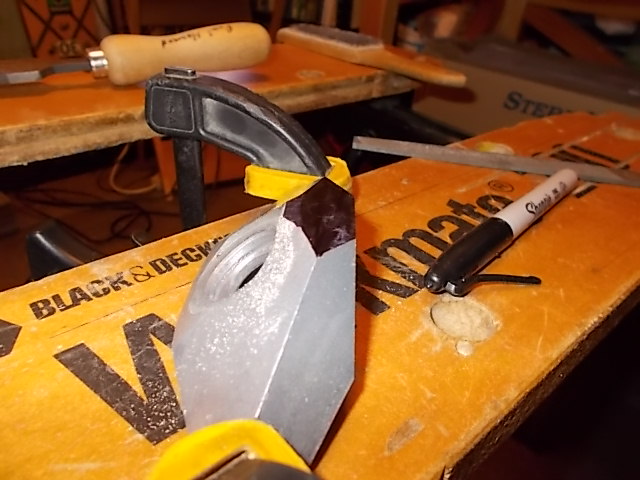
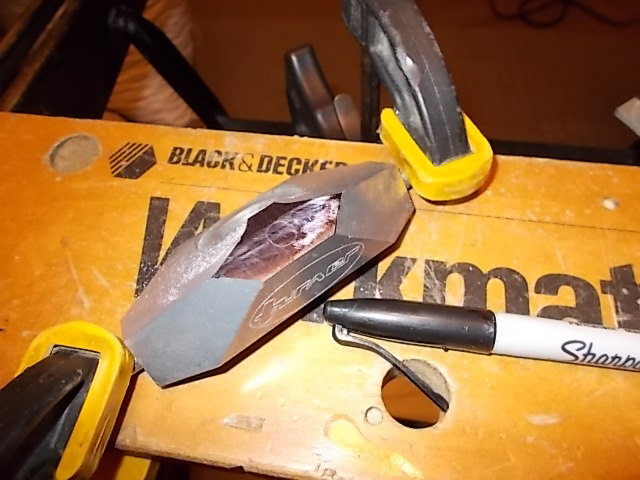
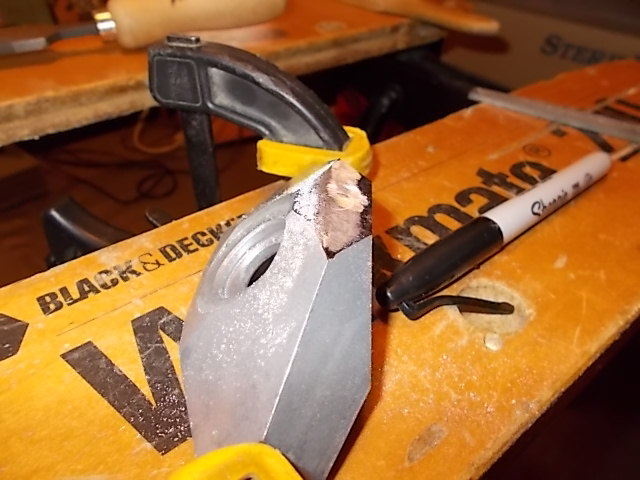
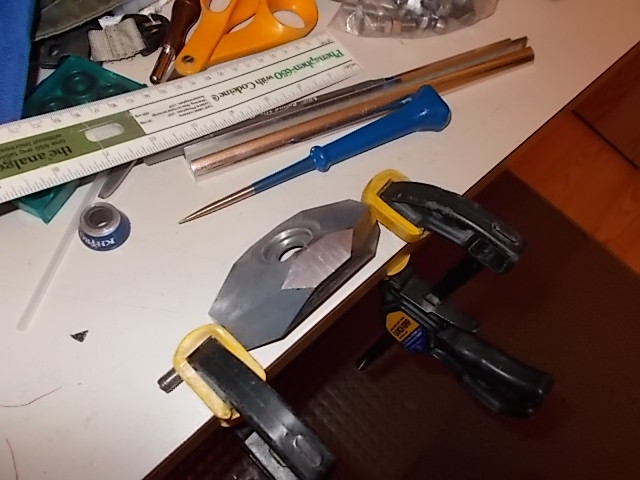
OK, so here's another attempt at putting pictures on formatted differently so hopefully they're more easily viewed. These are the next steps in my TTC rebuild. The pictures are in reverse order (sorry!) so start at the bottom and work your way up. The "Sharpee" marker is to mark the new facet and keep track of where you are filing away metal and where to leave it alone. This is a very similar technique I use in wood bow-making.
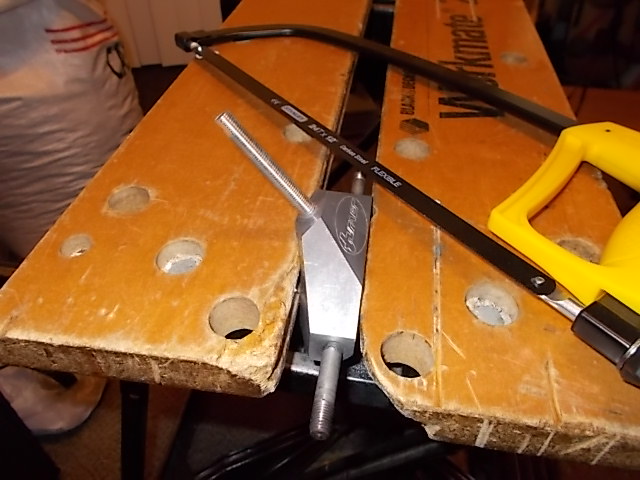
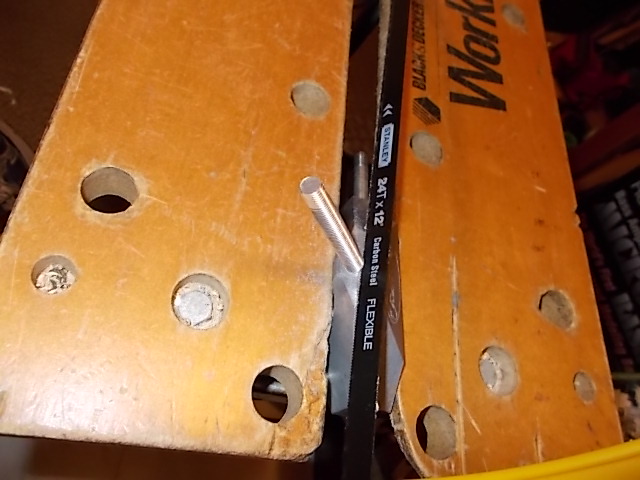
TV entertainment in the work-room whilst working
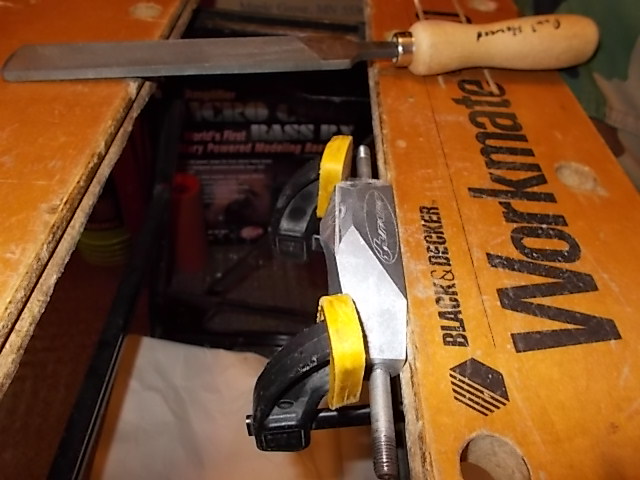
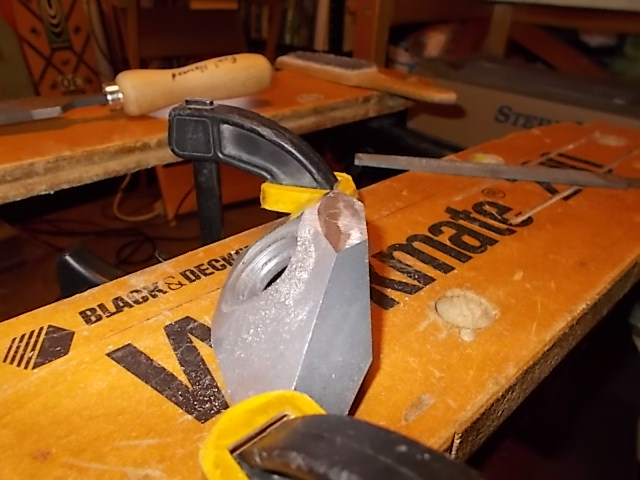
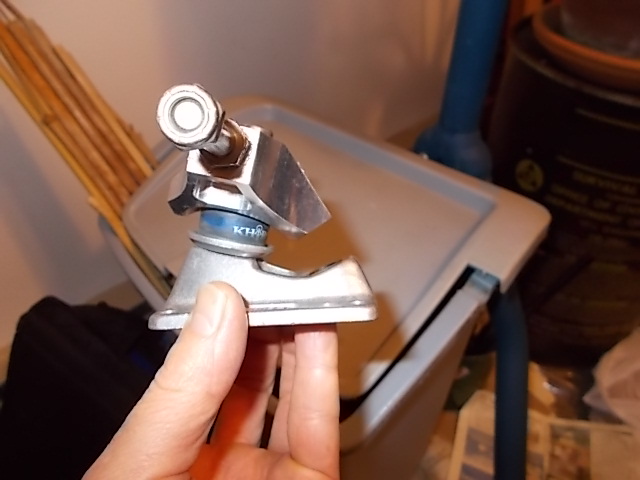
Splitfire for comparison.
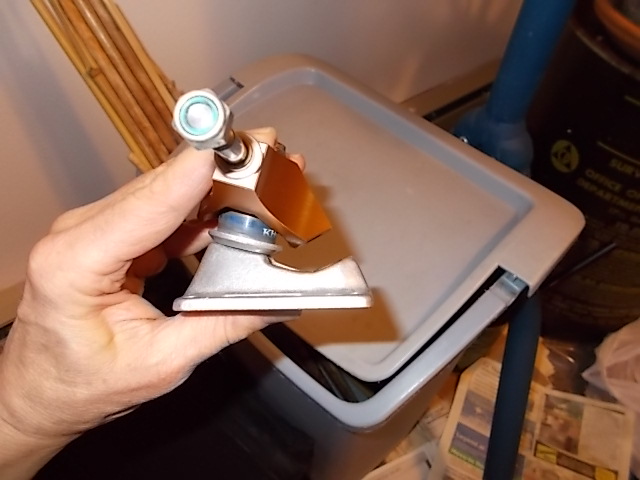
Airflow OS for comparison.
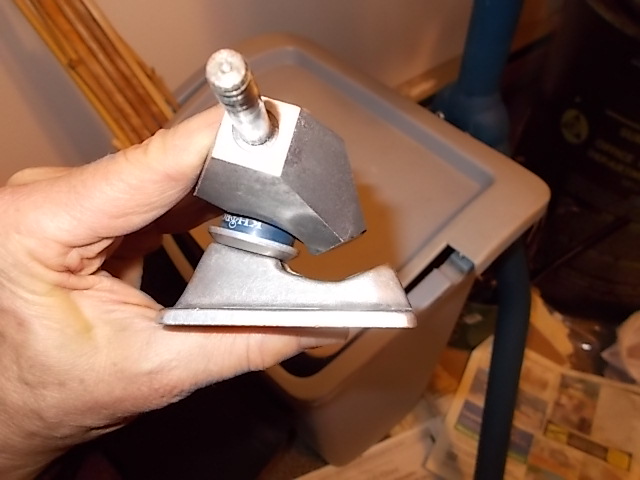
The TTC I'm working on, compare to Splitfire and Airflow.
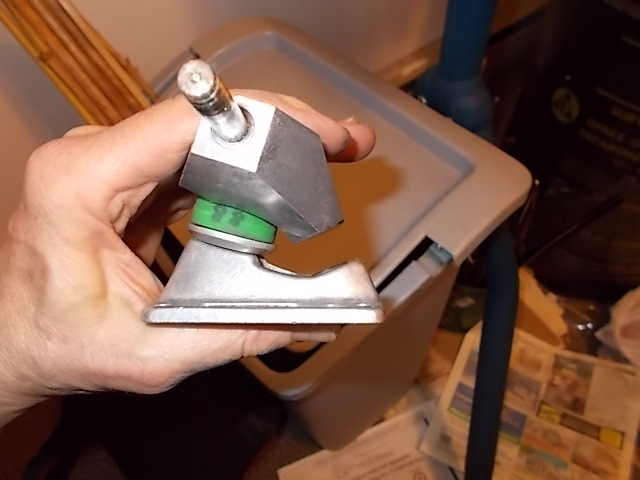
Same thing, taller Stimulator bushing.
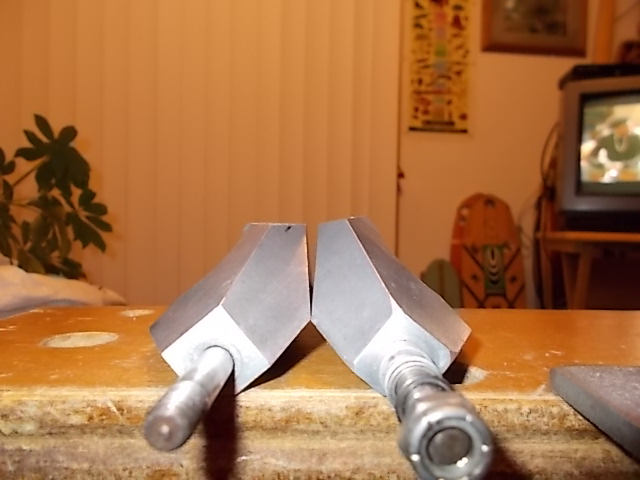
TTC I'm working on to the Left, TTC un-altered on the Right.
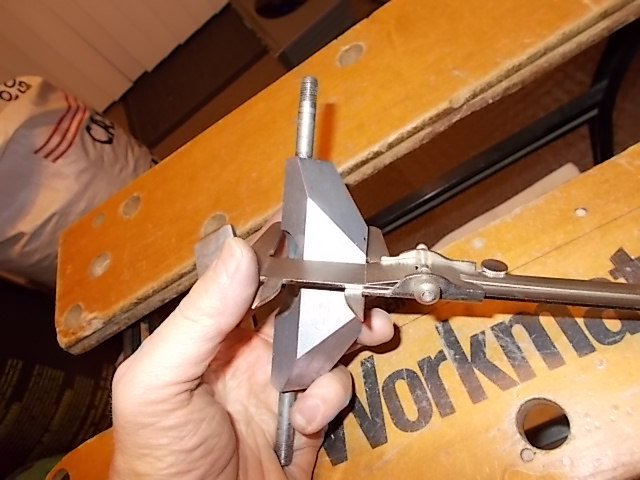
Calipers are one of your best friends in wood bow-making, and here too, Calipers are a really, REALLY good friend to have. Not that expensive either.
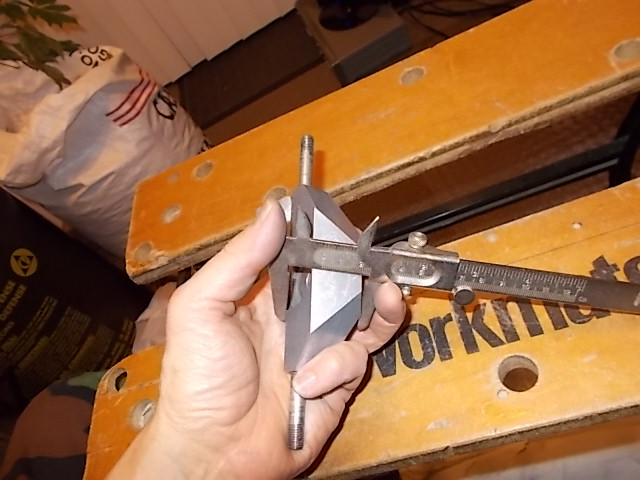
If you can check it with a caliper, then you should check with a caliper, use the caliper all over the place. Don't "think" everything is OK, "KNOW" that everything is OK.
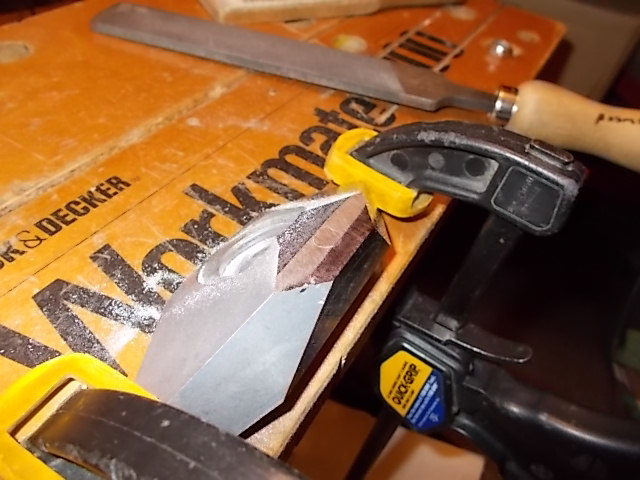
Out of order picture showing use of Sharpee ink marker with file to guide your work.
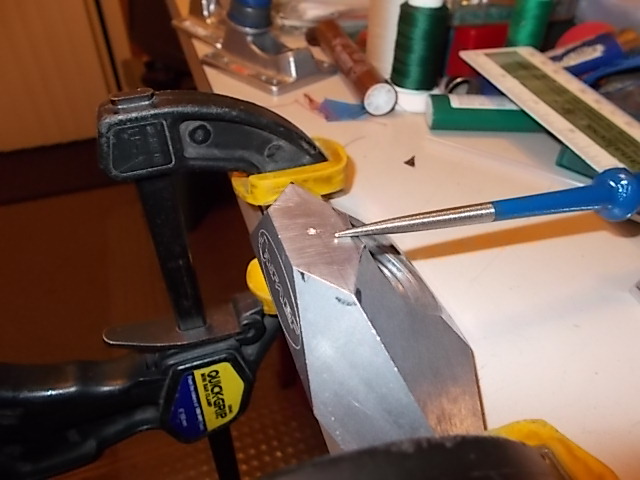
Use a sharp hard metal pointy thing (like this scribe) and mark the new facet to guide you.
TV entertainment in the work-room whilst working
Splitfire for comparison.
Airflow OS for comparison.
The TTC I'm working on, compare to Splitfire and Airflow.
Same thing, taller Stimulator bushing.
TTC I'm working on to the Left, TTC un-altered on the Right.
Calipers are one of your best friends in wood bow-making, and here too, Calipers are a really, REALLY good friend to have. Not that expensive either.
If you can check it with a caliper, then you should check with a caliper, use the caliper all over the place. Don't "think" everything is OK, "KNOW" that everything is OK.
Out of order picture showing use of Sharpee ink marker with file to guide your work.
Use a sharp hard metal pointy thing (like this scribe) and mark the new facet to guide you.
Last edited by Paul Howard on Sun Nov 11, 2018 10:16 pm, edited 1 time in total.
I just dig slalom!
-
Paul Howard
- Posts: 202
- Joined: Sat Dec 27, 2003 7:15 pm
- Location: Corvallis, Oregon. USA
Re: "Slalom Shop" DIY modifications and making slalom stuff.
Note how things don't sit correctly, this is the TTC being modified.
Hmmm, these pictures aren't quite showing up the way I intended so a bit more messing around is in order. More to come. Stay tuned.
I just dig slalom!
-
Paul Howard
- Posts: 202
- Joined: Sat Dec 27, 2003 7:15 pm
- Location: Corvallis, Oregon. USA
Re: "Slalom Shop" DIY modifications and making slalom stuff.
Hmm, Interesting, somehow this thread is now in a more noticeable and easier to find place than I remember when I first started, so THANKS!!! to whoever moved it and made that change (unless I'm imagining a change that isn't really there?).
My first thing I'm going to try post as I slowly have time at home to work on it is changing the pivot screw angle on TTC hangers. Anyone whoever rode a TTC then got either an Asphalt Playground Phase 1 Splitfire rear truck or Airflow OS rear truck likely noticed they were nicer than the TTC, part of that reason is the pivot screws were set an an angle that actually matches the Tracker RT-X, Tracker Axis or Independant baseplates whereas the TTC is close but not quite right. Coming soon. Thanks -PTH
My first thing I'm going to try post as I slowly have time at home to work on it is changing the pivot screw angle on TTC hangers. Anyone whoever rode a TTC then got either an Asphalt Playground Phase 1 Splitfire rear truck or Airflow OS rear truck likely noticed they were nicer than the TTC, part of that reason is the pivot screws were set an an angle that actually matches the Tracker RT-X, Tracker Axis or Independant baseplates whereas the TTC is close but not quite right. Coming soon. Thanks -PTH
I just dig slalom!
-
John Davies
- Posts: 27
- Joined: Wed Apr 25, 2007 9:54 pm
- Location: UK
Re: "Slalom Shop" DIY modifications and making slalom stuff.
Cool. I look forward to the postings.
-
Paul Howard
- Posts: 202
- Joined: Sat Dec 27, 2003 7:15 pm
- Location: Corvallis, Oregon. USA
Re: "Slalom Shop" DIY modifications and making slalom stuff.
Hey, yeah, I saw that thread and that's kinda what I want to do here. Everyone is welcome to post anything they do to modify or make anything slalom related with boards, wheels, trucks, etc, or if you do a thing to your skatepark board that is also applicable to a slalom deck (such as home-made nose guards or adding fiberglass for instances) that's welcome here too. Thanks for posting the "heads up" on the archives from Silverfish (a moment of silence please).
Adios - Paul Howard
Adios - Paul Howard
I just dig slalom!
-
Jani Soderhall
- Former ISSA President (2011-2024)
- Posts: 4784
- Joined: Thu Aug 22, 2002 2:00 am
- Location: Sweden, lives in France
- Contact:
Re: "Slalom Shop" DIY modifications and making slalom stuff.
Thanks Paul! Let me know if you need any help.
Recently Doug Kadzban helped save plenty of board photos from Silverfish and as they've now closed their site we put a couple of posts in the board forum (http://www.slalomskateboarder.com/phpBB ... .php?f=171) with those photos.
The below topic shows choppers and home made decks:
http://www.slalomskateboarder.com/phpBB ... 171&t=9401
-
Paul Howard
- Posts: 202
- Joined: Sat Dec 27, 2003 7:15 pm
- Location: Corvallis, Oregon. USA
"Slalom Shop" DIY modifications and making slalom stuff.
Hi, I've been modifying a LOT of my equipment since I got into skateboarding, and especially in Slalom racing. I figured I'd post "how-to" pictures and postings so people can see cheap lo-tech ways to make their equipment better, especially if they're on a budget. Anyone who does similar Do-it-yourself projects will be welcome to post their projects on wheels, decks, trucks, etc. I want to keep this a "Do it yourself" Slalom-related thread. Since most people are on Facebook and Facebook is very transitory whereas SS.com is a good long term "library" to look things up, I'll hopefully keep this thread here and post links to it on Facebook that brings people here (Thanks to Mig for the suggestion). Thanks -PTH
I just dig slalom!


